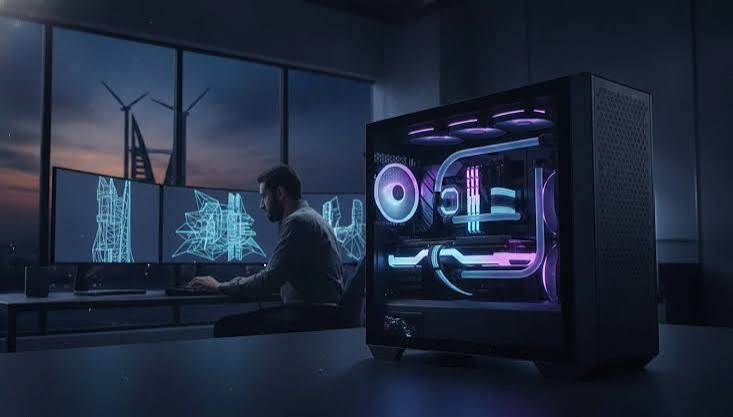
I spent three weekends last winter parts-shopping for a workstation build meant to handle video editing and some light 3D rendering, and I nearly talked myself into a graphics card that cost more than the rest of the machine combined. A friend who does this kind of work for a living talked me down, and thank goodness he did, because I ended up with a machine that handles everything I throw at it for a fraction of what I almost spent. This article walks through what I actually learned building it, the parts that mattered, the parts that didn’t matter nearly as much as I assumed, and the mistakes I nearly made along the way while second-guessing almost every single purchase.
Why A Workstation Build Costs
Workstation pricing gets inflated fast once you start comparing spec sheets against gaming rigs, because the marketing language around “professional” hardware assumes deep pockets. A proper workstation build for editing or rendering work can run anywhere from 900 dollars on the lean end to well over 4000 if you’re chasing top-tier everything, and most of that range comes down to a handful of components rather than the whole parts list.
What surprised me most is how much the price gap between “good enough” and “overkill” narrows once you actually benchmark real workloads instead of trusting marketing charts. A mid-range CPU paired with enough RAM outperformed a flashier setup I almost bought, purely because my software cared more about memory bandwidth than raw clock speed. Knowing that ahead of time would have saved me a few hundred dollars right out of the gate.
Labor costs matter too if you’re not building it yourself. Prebuilt workstations from boutique shops often tack on 300 to 600 dollars in assembly and testing fees, which isn’t unreasonable for the convenience and peace of mind it offers, but it’s worth knowing that number exists before you compare a prebuilt quote against a parts list total, since the gap can be bigger than it first appears once shipping and warranty terms get factored in too.
Where Real Savings Actually Happen
Most guides tell you to cut corners on the case or the cooler, and I think that’s backwards advice for anyone doing sustained work. The tech coverage on Lidnews touches on this pattern a lot too, where flashy components get the spotlight while the boring parts that actually keep a machine stable get ignored entirely.
The real savings, in my experience, come from buying last-generation components at a discount rather than chasing the newest release. A CPU that’s one generation behind the current flagship often performs within 10 to 15 percent of it for a third of the price, and for most workstation tasks that gap simply doesn’t matter in practice.
Buying open-box or refurbished components from reputable retailers is another underrated move. I picked up my case and power supply this way and saved almost 80 dollars combined, with zero issues eight months later. Not every part is worth the risk, but those two categories rarely fail even when refurbished.
Picking The Right CPU First
The processor decision shapes everything else in a workstation build, so it’s worth getting right before locking in a motherboard or case. Core count matters a lot for rendering and video encoding, since those workloads scale well across many threads, while single-core speed still matters more for certain editing software and everyday responsiveness.
I went with a mid-range chip that had eight cores and sixteen threads, which handled my rendering jobs about 40 percent faster than my old quad-core setup without costing anywhere near what the top-tier chips run. Overkill processors sound tempting, but unless your specific software is verified to use every core efficiently, you’re often paying for headroom you’ll never touch.
Thermal design also plays into this decision more than people expect. Higher core-count chips generate more heat under sustained load, which pushes you toward better cooling and sometimes a bigger case, so the CPU choice quietly influences your entire budget in ways that aren’t obvious upfront.
GPU Choices For Real Work
This is where I almost made my biggest mistake. Gaming benchmarks convinced me I needed the most powerful card on the shelf, but professional software often responds to GPU horsepower completely differently than games do. Some rendering engines barely touch the GPU at all, while others depend on it heavily, so knowing your specific software’s behavior matters more than any general advice.
I ended up with a mid-tier card that has enough VRAM for my typical project sizes, and it’s handled everything without a single bottleneck so far. The card I almost bought would have added nearly 700 dollars to my total for performance gains I genuinely wouldn’t have used more than a handful of times a year.
If you’re doing CAD work, video color grading, or GPU-accelerated rendering specifically, this calculation shifts, and a stronger card becomes worth the money. But for general editing, writing-heavy coding work, or light 3D tasks, the mid-tier options usually punch well above their price point.
How Much RAM Matters
RAM is one of those components people either wildly underbuy or wildly overbuy, with not much sensible middle ground getting discussed. For most editing and light rendering work, 32 gigabytes handles everything comfortably, while heavier multitasking or larger project files can push that need toward 64 gigabytes without much added cost.
I started with 32 gigabytes and upgraded to 64 about four months in, once I noticed my system swapping memory during particularly large export jobs. That upgrade alone shaved close to 20 percent off my render times on bigger projects, which was a bigger jump than I expected from just adding memory.
Speed matters less than capacity for most workloads, so I wouldn’t chase the fastest RAM kit available unless your specific software documentation calls for it. Spending the difference on capacity instead of raw speed tends to pay off more consistently across different types of work.
Storage Setup For Heavy Workloads
A single fast drive isn’t enough once your project files start piling up, and this is a lesson I learned the hard way after filling my primary drive within two months. A tiered setup works better: a fast NVMe drive for the operating system and active projects, paired with larger, slower storage for archived files and finished work.
I run a 1 terabyte NVMe drive as my main workspace and a 4 terabyte hard drive for everything else, and the price difference between that setup and an all-NVMe build was substantial, easily 300 dollars or more depending on capacity. For archived files you’re not actively editing, the speed difference genuinely doesn’t matter.
Backup strategy deserves a mention here too. I learned the importance of automated backups after a near-miss with a failing drive last year, and now everything important gets mirrored to an external drive weekly without me having to remember to do it manually.
Cooling Your Workstation Build Properly
Cooling gets treated as an afterthought by a lot of first-time builders, myself included on my first attempt years ago, and it’s genuinely one of the more important decisions in a workstation build meant for sustained workloads rather than short bursts of gaming.
Air cooling handles most mid-range builds just fine, and I’d argue it’s the smarter choice for anyone not overclocking aggressively, since it’s simpler, quieter over the long run, and has fewer failure points than liquid cooling. My air cooler keeps temperatures reasonable even during hour-long render jobs, which was my biggest worry going in.
Case airflow matters just as much as the cooler itself. I initially had my fans set up in a configuration that trapped heat instead of moving it through the case, and swapping two fan directions dropped my idle temperatures by almost 8 degrees without spending a single extra dollar.
Power Supply Sizing Done Right
Undersizing a power supply is a mistake that doesn’t show up immediately, which makes it sneaky. My system ran fine for the first few weeks on a borderline unit before it started randomly shutting down under heavy load, and swapping to a properly sized supply solved it instantly.
A good rule of thumb is calculating your components’ combined power draw and adding a comfortable 20 to 30 percent buffer on top, both for stability and to leave room for future upgrades. I went with an 850 watt unit for a system that technically only needed around 650, and I’ve never regretted the extra headroom.
Efficiency ratings matter too, though people obsess over them more than necessary. A mid-tier efficiency rating is perfectly fine for most home workstations, and chasing the absolute highest rating available usually isn’t worth the price premium unless you’re running the machine nonstop for work reasons.
Case Choices And Airflow Basics
The case is one of those components people cut corners on to save money, and I understand the temptation, but airflow design genuinely affects every other component’s performance and lifespan. A case with poor ventilation can undercut even a great cooling setup, no matter how much you spent on the fans themselves.
I picked a mid-tower case with clear front and side ventilation over a flashier option with tempered glass panels that looked better but restricted airflow noticeably. Function won out over looks here, and my temperatures thanked me for it during the first heavy workload week.
Cable management space matters more than people expect too. A case with room behind the motherboard tray for routing cables keeps airflow cleaner and makes future upgrades far less frustrating than fighting a tangle of wires every time you need to swap a part.
Motherboard Features Worth The Money
Motherboards have a wide price range, and it’s easy to overspend on features you’ll genuinely never use, like extensive RGB lighting controls or excessive M.2 slots beyond what your storage plan actually needs. I’d rather spend that difference on RAM or storage capacity instead.
What actually matters is checking that the board supports your chosen CPU’s full potential, has enough USB ports for your peripherals, and includes decent onboard networking if you’re not adding a separate card. I skipped Wi-Fi entirely since my setup is wired, which saved a small amount without any real downside.
VRM quality is worth researching if you’re running a higher core-count CPU under sustained load, since cheaper boards sometimes throttle performance under extended stress. This is a detail that doesn’t show up in casual spec comparisons but genuinely affects long-term stability.
Peripherals That Actually Improve Workflow
A powerful workstation build feels wasted if the peripherals around it are holding you back, and this is a category people underspend on after blowing their budget on internal components. A second monitor, in particular, changed my workflow more than almost any internal upgrade did.
I added a color-accurate secondary display specifically for reviewing exported work, and it’s paid for itself many times over in caught mistakes I would have otherwise missed on a lower quality panel. Keyboards and mice matter too, though the returns diminish quickly once you’re past a reasonably comfortable option.
Cable management for peripherals sounds trivial, but a cluttered desk genuinely slows people down over months of daily use. A simple monitor arm and some basic cable clips made a bigger difference to my daily comfort than I expected going in.
Operating System And Driver Setup
Software setup gets rushed by a lot of builders eager to start using their new machine, but taking an extra hour here saves headaches down the road. Keeping drivers current, particularly GPU and chipset drivers, prevents a surprising number of stability issues that get blamed on hardware when they’re really software problems.
I run a clean operating system install rather than using bundled manufacturer software, since a leaner install tends to boot faster and avoids background processes competing for resources during heavy workloads. It’s a small step that took maybe twenty extra minutes but noticeably improved responsiveness.
Backup imaging your fresh install once everything’s configured is worth the effort too. Having a clean restore point saved me hours of reconfiguration after a driver update caused instability a few months in, and I was back up and running within the hour instead of losing an entire day.
Benchmarking Your Finished Workstation Build
Once everything’s assembled, running actual benchmarks specific to your workload matters more than generic scores you’ll find online. A high overall benchmark score doesn’t guarantee your specific rendering software or editing suite will perform well, since different programs stress components in different ways.
I ran my actual project files through export tests before and after each major component swap, which gave me real numbers instead of guessing based on marketing claims. This habit alone helped me catch a cooling issue early, since my render times were inconsistent until I fixed my fan configuration.
Comparing your finished workstation build against online benchmark databases can help spot if something’s underperforming, but treat those numbers as a rough guide rather than gospel, since cooling, case airflow, and even ambient room temperature all affect real-world results.
Common Workstation Build Mistakes Made
The single biggest mistake I nearly made was buying components in the wrong order, starting with a GPU before confirming what my actual software needed from it. Locking in your primary use case before shopping saves money and prevents buyer’s remorse on expensive components you didn’t actually need.
Ignoring case compatibility is another common misstep. I almost bought a graphics card that wouldn’t have physically fit in my chosen case, and only caught it by double-checking dimensions before checkout. Measuring twice before buying anything oversized has saved me from at least two expensive returns.
Skipping stress testing after assembly is the last mistake worth mentioning. A system can boot and seem fine for days before a marginal component reveals itself under sustained load, so running your machine hard for a few hours before trusting it with real work catches problems early.
Upgrading Later Without Starting Over
One advantage of building rather than buying prebuilt is the ability to upgrade individual pieces later without replacing the whole machine. I’ve already swapped my RAM once, and I’m planning a storage upgrade next year once prices come down further on higher capacity drives.
Choosing a motherboard with some room to grow, rather than the absolute cheapest option available, pays off here. Extra RAM slots and a couple of spare drive bays cost very little upfront but make future upgrades dramatically simpler than they’d otherwise be.
Keeping your power supply slightly oversized from the start also means future GPU or CPU upgrades won’t require replacing it too. That single decision alone has already saved me one unnecessary purchase since finishing the initial build.
Budget Versus Premium Workstation Build
Comparing a budget workstation build against a premium one comes down to diminishing returns more than most people expect. My roughly 1400 dollar build performs within about 15 percent of a comparable 2500 dollar prebuilt system for my specific workload, which is a gap I genuinely don’t feel day to day.
Premium builds make more sense for people running professional workloads where time saved translates directly into billable hours, since a faster render time isn’t just convenient, it’s money. For hobbyists or people doing occasional project work, that math rarely justifies the extra spend.
I’d rather see someone build a solid mid-range machine now and upgrade specific bottlenecks later than overspend upfront on capability they won’t use for years. That approach has worked well for me and kept my budget flexible for other priorities.
Final Thoughts On Workstation Build
Looking back at the whole process, the parts I almost overspent on turned out to matter the least, while boring components like cooling, storage tiering, and a properly sized power supply made the biggest practical difference. That’s not the story most shopping guides tell, but it’s what actually played out once I started using the machine daily.
If you’re planning your own workstation build soon, my honest advice is to figure out exactly what software you’re running and how it actually uses your hardware before spending a single dollar on anything flashy. Marketing charts and generic benchmarks will steer you toward expensive components that may never get used the way you’re imagining, no matter how convincing the spec sheet looks sitting in the store.
Frequently Asked Questions
How much should a basic workstation build cost? A capable workstation build for editing or light rendering typically runs between 900 and 1500 dollars, depending on which components you prioritize and whether you buy new or refurbished parts.
Is a gaming PC the same as a workstation build? Not quite. Gaming machines prioritize GPU performance for graphics rendering, while a workstation build often benefits more from balanced CPU power, RAM capacity, and storage speed depending on the software involved.
Do I need liquid cooling for a workstation build? Usually not. Air cooling handles most sustained workloads just fine unless you’re overclocking aggressively or working with an unusually high core-count processor under constant load.
How often should I upgrade my workstation build? Most people get three to five solid years out of a well-planned build before a major upgrade becomes worthwhile, though individual components like RAM or storage can be refreshed sooner as needs change.
Conclusion
Building a workstation from scratch taught me more about where money actually matters in a machine than any spec sheet or forum thread ever did. The expensive-looking components aren’t always the ones doing the heavy lifting, and the boring parts, cooling, storage tiering, a properly sized power supply, often make the bigger practical difference once you’re using the machine every day for real work.
If you’re staring down your own parts list right now, take the time to figure out what your specific software actually needs before chasing the biggest number on a spec sheet. I nearly spent hundreds of dollars on a GPU that would have sat mostly idle, and I’m genuinely glad someone talked me out of it before checkout. A thoughtful, well-balanced build will outperform an expensive, unbalanced one almost every time, and your wallet will notice the difference immediately.